This is a whole new project which I am delighted to be part of! Please come visit, and leave a comment. It is called Prepper Archive, and it is a blog of all things to prepare us for anything in the future!
Cheers,
Viviana
Showing posts with label thrifty finds. Show all posts
Wednesday, June 27, 2012
Monday, August 22, 2011
Fabulous thrifty find!
| Quite the cute little table! |
I scooped it up and brought it home to get some loving. It's been in the hallway for months and I finally got the right paint (that $8 one I used for the nesting tables) to use on this cutie. It did have a broken joint, but since it's not like anyone will be sitting on it I just used run of the mill wood glue and tied it up so that the leg would set.
| I've used it with a broken leg for months and since it never even wobbled, a little glue was all I used to fix it. |
| A little sanding in the right spots, and it looks nicely worn and stylish! |
| There she is, looking perfect in the hall! |
Cheers,
Viviana
I will link up to
Friday, August 12, 2011
Another Unebelievable Back Alley Find!
Sometimes many roads lead to your destination, you have to always be on the lookout for interesting finds along the way.
Last week, Dayday had camp all week, not far from our house but still a 7-10 minute drive. There was roadwork being done, so they set up a detour through a couple back alleys to get to the center, and although I could have gone around on another road, I chose the detour because who doesn't like a few bumps along the road? Anyhow, I happen to glance at my side view mirror and saw 3 little tables just thrown down on a little patch behind one of the houses. I didn't go back that way until the next morning, and the tables were still there, but someone had stacked then since they seemed to be nesting tables. After I dropped the kids off, I returned through the back alley and decided they needed a home....My Home to be specific!Yes, they were covered in dirt and mud, scratched up and in dire need of lots of love, who knows how long they had been waiting for me??
I went to Canadian Tire, straight to the mistint department of course, and decided on a very dark navy (midnight) sort of colour, it said it was great for doors and trim which to me translates to good wear and tear and possible long lasting, so at $8 for the quart, perfection!
I took the tables apart with my handy dandy ratchet screwdriver, and took the frames outside where I had to soap them up and hose them down to get the muck and mud off.
The tops I washed and then sanded well with a 100 grit sand paper. I then got down to the painting which I did out on the deck (it was about 27c out!!) things dry fast in that heat!
By the next morning I was ready to give them the final sand down and de-stress, which makes them look vintage and slightly worn and perfect for the look of the living room/dining room in my little home.
I wasn't too sure as to where I would put them, but I wanted them to be handy enough for when we have guest, they can be pulled out for drinks or food or to play a game on etc.
I found the perfect spot, but I had to try to tie everything in nicely. I added another piece from my awesome collection of thrifty finds. Then I had to move the leaves around a bit, I like them but they didn't look right.
The end result is perfect in that small space. I sometimes look at my house and all I want is to run away from the clutter, but you know what...it is not because I don't want it, it is because I just have to organize it better. So slowly, it is coming together and I'm loving it!
Cheers and thanks for stopping by!!
Viviana
I'll link up to:


Last week, Dayday had camp all week, not far from our house but still a 7-10 minute drive. There was roadwork being done, so they set up a detour through a couple back alleys to get to the center, and although I could have gone around on another road, I chose the detour because who doesn't like a few bumps along the road? Anyhow, I happen to glance at my side view mirror and saw 3 little tables just thrown down on a little patch behind one of the houses. I didn't go back that way until the next morning, and the tables were still there, but someone had stacked then since they seemed to be nesting tables. After I dropped the kids off, I returned through the back alley and decided they needed a home....My Home to be specific!Yes, they were covered in dirt and mud, scratched up and in dire need of lots of love, who knows how long they had been waiting for me??
I went to Canadian Tire, straight to the mistint department of course, and decided on a very dark navy (midnight) sort of colour, it said it was great for doors and trim which to me translates to good wear and tear and possible long lasting, so at $8 for the quart, perfection!
I took the tables apart with my handy dandy ratchet screwdriver, and took the frames outside where I had to soap them up and hose them down to get the muck and mud off.
The tops I washed and then sanded well with a 100 grit sand paper. I then got down to the painting which I did out on the deck (it was about 27c out!!) things dry fast in that heat!
By the next morning I was ready to give them the final sand down and de-stress, which makes them look vintage and slightly worn and perfect for the look of the living room/dining room in my little home.
I wasn't too sure as to where I would put them, but I wanted them to be handy enough for when we have guest, they can be pulled out for drinks or food or to play a game on etc.
I found the perfect spot, but I had to try to tie everything in nicely. I added another piece from my awesome collection of thrifty finds. Then I had to move the leaves around a bit, I like them but they didn't look right.
The end result is perfect in that small space. I sometimes look at my house and all I want is to run away from the clutter, but you know what...it is not because I don't want it, it is because I just have to organize it better. So slowly, it is coming together and I'm loving it!
Cheers and thanks for stopping by!!
Viviana
I'll link up to:

Thursday, February 24, 2011
Spring Blossom for a Winter Day
It is -24 today with a windchill that makes it -33...so in order to get through this with no mental damages, I have decided to keep busy with my sewing and creating for my spring clothes, if spring ever comes that is!!
I must tell you, that I have been checking out tons of sewing blogs, trolling for new ideas. And of course, it helped that this weekend I got a great deal on a few t-shirts (bargain prices!!) that I can play with without feeling guilty. I also got a new shipment from Stampin' Up, which included a new blossom die which is (no pun intended) to DIE FOR!!
So here is a sneak at my new die, yummers, no??
The new die has these beautiful flowers, oh my they definitely look wonderful and are a good size, none of these puny baby size blossoms here! Well, maybe a couple....
I took the pink one, cut off the sleeves and removed about 5 inches off the bottom. I also took it in quite a bit under the arms, and left it fuller at the hips. I have a wider bottom so I don't like my tops to fit tight along there, usually they are too big for me at the shoulders, so I normally take them it at the arm pits anyhow.
Lucky for me, I have this really great plus size body form (size 14, just my size!!) So I can try things on it and make sure they will fit me properly. Though I am a little shorter, this form works well because it allows me to pin and tuck where I need it most. I got it from a store for plus sized ladies (it was not easy finding one though, took a couple weeks), and covered it with vintage dictionary pages to hide the logo!
So there you have it, my own blossom blouse....very much like the one seen here for a lot more...
I quite like mine, for $3 plus time, worth it for sure!
Cheers and enjoy crafting,
Viviana


I must tell you, that I have been checking out tons of sewing blogs, trolling for new ideas. And of course, it helped that this weekend I got a great deal on a few t-shirts (bargain prices!!) that I can play with without feeling guilty. I also got a new shipment from Stampin' Up, which included a new blossom die which is (no pun intended) to DIE FOR!!
So here is a sneak at my new die, yummers, no??
| Sneak a peek!! |
The new die has these beautiful flowers, oh my they definitely look wonderful and are a good size, none of these puny baby size blossoms here! Well, maybe a couple....
| So the shirts I used for this particular project were 40% off the lowest price. |
| Notice I got 2 shirts in 3XL (I am a XL, but wanted the extra fabric for what you'll see. |
| I then took the sleeves and cut as many flowers as I could out of them, both in the small and large. |
| I layered them (3 large petaled and one small for the big ones) and hand sewed them together, then pinned them onto the top using my wonderful dummy body. |
| This is how they looked once I sewed them onto the blouse. |
| I think it was so easy to just use my die cutter, the whole thing took me about 1 hour to make! |
I quite like mine, for $3 plus time, worth it for sure!
Cheers and enjoy crafting,
Viviana

Thursday, February 10, 2011
My $2 lamp Redo
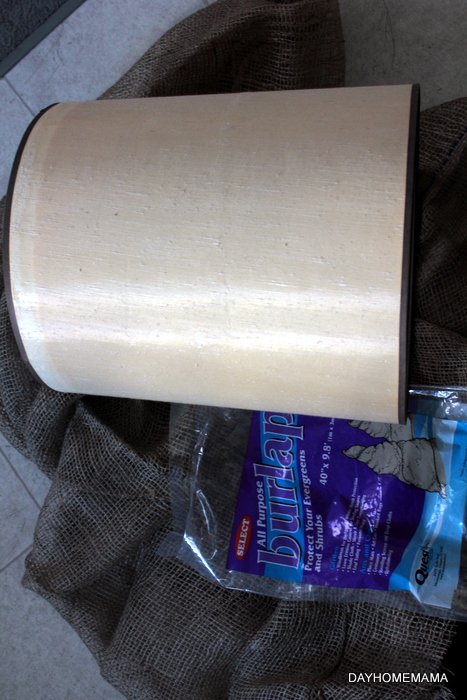
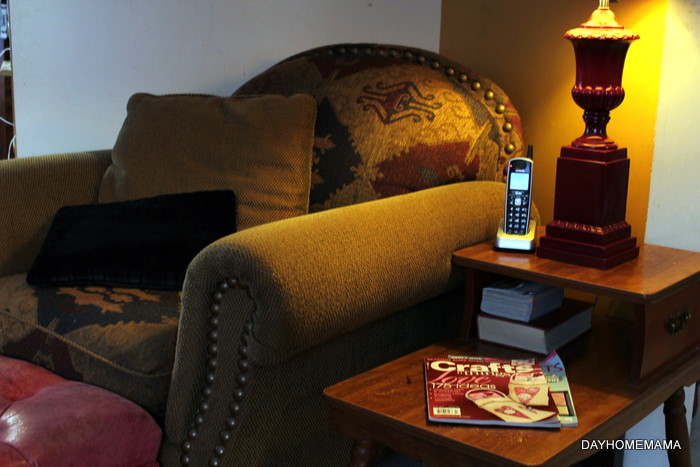
I love it when a project works out better than expected!I chose Burgundy and as it turned out, it completely changed the feel of the room and added a depth to the room for, it looks cozier and there is more light even if it's subdued, it is perfect!!
I got the lamp for $2, the shelf for $1, the paint for $4, I already had the burlap, the hot glue gun and the spray glue. All together, the project cost $7 and about 1 hour of work. Loves it!!!!
Check out all the other projects and thrifty finds at,


Thanks so much for stopping by and leaving some comments.
Cheers,
Viviana
| It's perfect for my free table (got it from a back alley, it was being thrown out I guess), which will get refinished at a later date. |
| This little wall shelf got the treatment too. |
| I love Krylon paints, they not only dry in 10 minutes, they are inexpensive and you can paint almost anything! |
| I covered the lampshade with the cheap burlap, I wanted it to have lots of contrast with the shiny paint job. |
| This hangs on the wall on the other side of the entrance of the living room, it looks great with my Russian Matryoshka Dolls. |
I got the lamp for $2, the shelf for $1, the paint for $4, I already had the burlap, the hot glue gun and the spray glue. All together, the project cost $7 and about 1 hour of work. Loves it!!!!
Check out all the other projects and thrifty finds at,

Thanks so much for stopping by and leaving some comments.
Cheers,
Viviana
Subscribe to:
Posts (Atom)