Showing posts with label krylon paint. Show all posts

Saturday, August 6, 2011

Lemonade Stand

David and I were blog hopping a few months back and he saw a lemonade stand made out of a microwave cart at Pleased As Punch's blog. He's been asking to have one since winter so we finally decided the old microwave cart (didn't even have to go to Sally Anne to get one!) we had in the dining room was perfect and if we made it into a lemonade stand, at least it would not end up in the dump, like most particle board furniture does!
We picked up some yellow paint at Canadian Tire, Krylon of course, since it's dry in 10 minutes!!! (I have this bad luck of easily forgetting paint is wet....) so Krylon is a dream to use.

The cart was white so all I did was wash it down with a little soap and water to get the dust off, then I set it outside on the lawn on top of a cheap plastic drop sheet. I had for some silly reason, already pasted up the dollar store chalkboard on the back side. So I had to tape it up a bit to mask it and keep it from turning yellow! I do happen to LIKE doing things the hard way sometimes, how else would I learn what was easy then??
So I got it mostly covered in yellow paint, I may have not done the best job, but considering I did it in 20 minutes...it turned out great.
Once it was dry enough, I took a pencil and sort of mapped out what we had decided it should be called (David's Awesome Lemonade) and I brought out my box of paints for the rest of the project. I wish I had a cricut, then I would have used the vinyl I have to cut out the sign, but this should be ok, since I am a graphic designer, lettering comes easy.

That part was somewhat PAINTstaking, hehehe. It takes a steady hand not to mess up the words, and I did well right up until I did the little lemon graphic and grazed my hand on it....anyhow, I managed to fix it with q-tips and a little water.
This is what it turned out like, not bad for a hand painted sign. We had a sleep over 2 days later, and the kids decided to try their hand at sales. They picked mint from the garden and made mint lemonade in one pitcher and  sliced strawberries for the other. They all quickly realized it is not as easy as it looks and it helps for it to be a super hot day (which are few and far between here in Calgary!) and to have people that actually walk, also helps to not drink the product....They made $6 and split it 3 ways.

I think we will give this another try next week, hopefully we can entice more people to buy by lowering the price (I let them chose this time, and they thought $1 a cup was fair because they were big cups)  to 50c a up and maybe using the smaller cups too, and maybe doing it on a hot day this August. 
Anyway Cheers and thanks for stopping by,
Viviana

I am linking up to:
SAS Interiors
southern hospitalityMaking Keeping It SimpleThe DIY Show Off

Thursday, February 10, 2011

My $2 lamp Redo

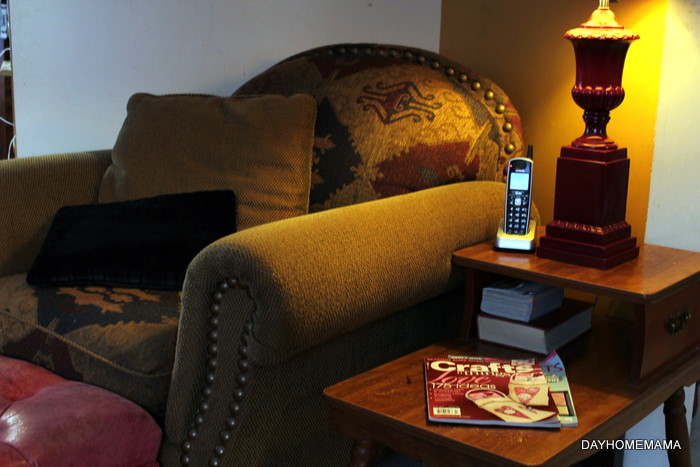
I love it when a project works out better than expected!I chose Burgundy and as it turned out, it completely changed the feel of the room and added a depth to the room for, it looks cozier and there is more light even if it's subdued, it is perfect!!
It's perfect for my free table (got it from a back alley, it was being thrown out I guess), which will get refinished at a later date.


This little wall shelf got the treatment too.

I love Krylon paints, they not only dry in 10 minutes, they are inexpensive and you can paint almost anything!
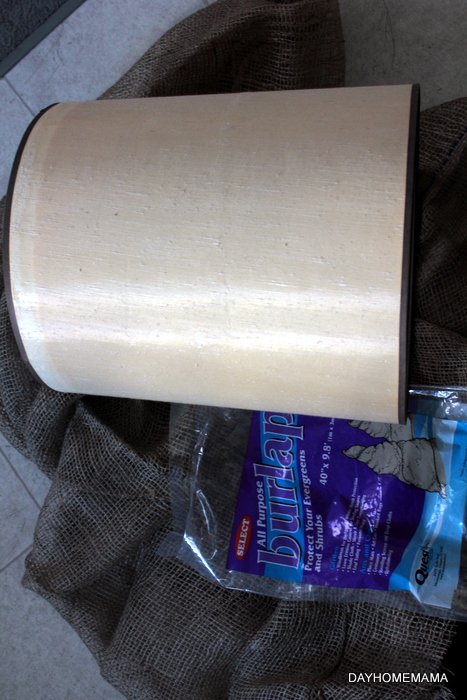
I covered the lampshade with the cheap burlap, I wanted it to have lots of contrast with the shiny paint job.


This hangs on the wall on the other side of the entrance of the living room, it looks great with my Russian Matryoshka Dolls.


I got the lamp for $2, the shelf for $1, the paint for $4, I already had the burlap, the hot glue gun and the spray glue. All together, the project cost $7 and about 1 hour of work. Loves it!!!!
Check out all the other projects and thrifty finds at,
 http://linda-coastalcharm.blogspot.com/Domestically SpeakingChic on a Shoestring Decorating
Thanks so much for stopping by and leaving some comments.
Cheers,
Viviana

Thursday, April 29, 2010

Bathroom Makeover, on the thrift!

I've lived in my little town house for over 6 years now, it seem like a long time, but it has flown by really. Now these places were built about 28 years ago, and for the most part they still had all the original floors and the walls were Antique White when I moved in. So far we now have laminate floors in the bedrooms, and I've painted some of the rooms, but because of my schedule and having a daycare in my home, not much else has had a chance to get done.

The bathroom has been on the list for a makeover for a while, and about 3 years ago, I picked out a paint I loved and thought would be perfect, of course that is if I got the floor replaced (it is a mustard yellow, and I say it is because thus far, we still have it!). 2 years ago, I ripped out the baseboards, in anticipation of painting the bathroom that summer. A year ago, I bought a new over the toilet cabinet in a nice dark Walnut colour from "Linens and Things" before it went under, and a really cool damask vinyl tattoo for my toilet tank and vinyl decor for my mirror from Janey Mac Press on Etsy. (we got a new toilet last summer too!)


I really liked the look of the mirror, but I think it really needed a frame to give it a more modern look.


Notice a trend here.... everything takes me about a year to get to.... Last month I finally painted in there (just so you know, there are still a couple spots I couldn't reach and might not get done until next year, because that's just how I roll!!) It is a very subtle blue/green, perfect for a bit of an ocean theme... not the trendiest of colours, but at least it's not antique white anymore....

I also got this wonderful bunch of goodies, for $4 at the local thrift store. A metal shelf, a metal milk/flower jug and a ornate picture frame.


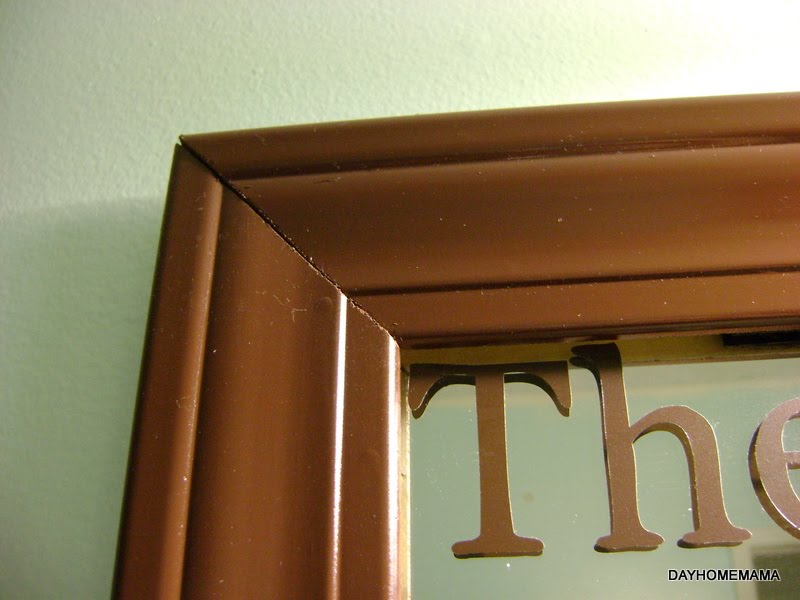
I also got some trim from Rona (not in the picture but was $14 total), which I had David's dad cut for me. I was going to use Tremclad, however I was not happy with the colours avaialble, so I chose my new favourite, KRYLON, in a nice dark brown called leather brown, remeniscent of a tasty Hershey's chocolate bar, and away I went. I really do love Krylon because not only is it cheaper than Tremclad, you can paint plastic, wood, metal and wicker among other things with it and it dries in 10 minutes! Imagine that?!

I spray painted then, attached the trim with velcro. That is, so if I ever move, I can return the bathroom to it's original state, not that anyone in their right mind would want it back to that!!


Even though up close you can see a tiny bit of the velcro in the mirror, it's only slight and only if you are actually looking for it, so I'm happy with the results! If you don't want to do it yourself for a few dollars, you can have a custom made frame from Mirror Mate, though they were a bit pricey for me.


I'm happy with it, specially that the whole bathroom now looks together, ignore the 7 toothbrushes and piles of towels on the rack.... I said together, not perfect, haha!


Transformation Thursday
Check out Shabby Chic Cottage for other wonderful makeovers and transformations!
Cheers and happy Thursday!
Viviana

LinkWithin

Related Posts with Thumbnails