Showing posts with label handmade. Show all posts

Sunday, December 11, 2011

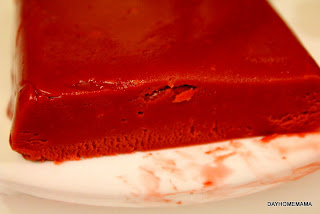
Never Fail RED VELVET fudge

In recent years, red velvet has become one of the most popular cakes, cupcake and flavours to serve for parties and events. I searched for the perfect red velvet fudge recipe, one that did not require me to be an expert or have special tools in my cupboard to get it done right. Luck for me, I am quite adventurous and decided to adapt a popular marshmallow recipe to re-create the cake into a special gifting Christmas treat.
You can find the recipe with the link or by clicking on the image. I have added it to the new friendscookbook, where you too can add recipes and share them with you FB friends.

Cheers and enjoy the sweets!
Viviana
I'll be joining in these linky parties:


Sumo's Sweet Stuff
Mandy‘s Recipe Box
Nap-Time Creations

Saturday, August 6, 2011

Lemonade Stand

David and I were blog hopping a few months back and he saw a lemonade stand made out of a microwave cart at Pleased As Punch's blog. He's been asking to have one since winter so we finally decided the old microwave cart (didn't even have to go to Sally Anne to get one!) we had in the dining room was perfect and if we made it into a lemonade stand, at least it would not end up in the dump, like most particle board furniture does!
We picked up some yellow paint at Canadian Tire, Krylon of course, since it's dry in 10 minutes!!! (I have this bad luck of easily forgetting paint is wet....) so Krylon is a dream to use.

The cart was white so all I did was wash it down with a little soap and water to get the dust off, then I set it outside on the lawn on top of a cheap plastic drop sheet. I had for some silly reason, already pasted up the dollar store chalkboard on the back side. So I had to tape it up a bit to mask it and keep it from turning yellow! I do happen to LIKE doing things the hard way sometimes, how else would I learn what was easy then??
So I got it mostly covered in yellow paint, I may have not done the best job, but considering I did it in 20 minutes...it turned out great.
Once it was dry enough, I took a pencil and sort of mapped out what we had decided it should be called (David's Awesome Lemonade) and I brought out my box of paints for the rest of the project. I wish I had a cricut, then I would have used the vinyl I have to cut out the sign, but this should be ok, since I am a graphic designer, lettering comes easy.

That part was somewhat PAINTstaking, hehehe. It takes a steady hand not to mess up the words, and I did well right up until I did the little lemon graphic and grazed my hand on it....anyhow, I managed to fix it with q-tips and a little water.
This is what it turned out like, not bad for a hand painted sign. We had a sleep over 2 days later, and the kids decided to try their hand at sales. They picked mint from the garden and made mint lemonade in one pitcher and  sliced strawberries for the other. They all quickly realized it is not as easy as it looks and it helps for it to be a super hot day (which are few and far between here in Calgary!) and to have people that actually walk, also helps to not drink the product....They made $6 and split it 3 ways.

I think we will give this another try next week, hopefully we can entice more people to buy by lowering the price (I let them chose this time, and they thought $1 a cup was fair because they were big cups)  to 50c a up and maybe using the smaller cups too, and maybe doing it on a hot day this August. 
Anyway Cheers and thanks for stopping by,
Viviana

I am linking up to:
SAS Interiors
southern hospitalityMaking Keeping It SimpleThe DIY Show Off

Monday, June 27, 2011

My SMASH book adventure....

Yup, I am following the masses and trying out Smashing...however, I happen to have too many supplies and I need another book/album/journal like I need another hole in my head.
So, I decided to make one.

My ingredients  list for the "base" go as follows,

Cardstock for the pages, pads are great for this.
Chipboard (I used very lightweight stuff, next time I'll use heavier stuff!!)
Coverstock for printing
Paper bags (I used super long sine bags)
Envelopes
Page protectors
Random papers and tags


I used my Fiskars rotary trimmer (so I could trim 6-8 cardstock pages at one time) to trim my pages down to 8x10 from 8.5 by 11. I also trimmer the covers to 8.5 by 10 1/2 so they fit properly after I punched and bound them with my Zutter.
 I learned that I need to use bigger wires if I am to make a bigger book (the pages turn fine but the cover is just a tiny bit too tight. I also think I will use heavier chipboard for the covers next time, so it feels more solid.

I printed up lots of ephemera pages from The Graphics Fairy and from JSIM, both websites have lots of freebie images to add to the pages.I used the coverstock for these, since it's heavy enough to handle stuff attached to the paper and I had it in a cream colour, to go with the vintage feel of the book.

If you click on the image, it will take you straight to the blog it came from, The Graphics Fairy.
Another one of the images I used.
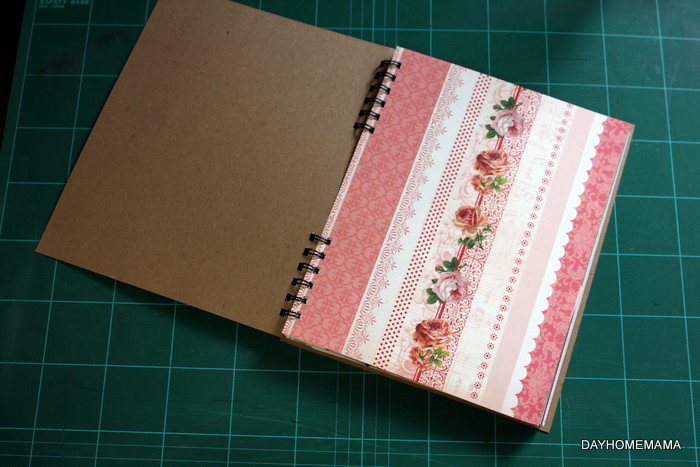
The inside front cover, I love roses so this had to be at the forefront of my Smash.

Again, another great ephemera image from the Graphics Fairy.

I think this page looks perfect!

I printed this with one right side up and the other upside down, adds to the charm.
I have to tell you that my printer ran out of yellow at some point, but I was not worried, I like the tones the pages took without it.
I have made a youtube video for my SMASH book, this is my first real video...so bear with me, I am not an expert yet! Once I figure this whole "editing" thing out, I am sure they will get much better.I am just working on part 2. You'll see the progress in that video.

Anyhow, time to run and make dinner. The kid is getting hungry.....

Cheers,
Viviana


Just linking up to a few blogs,
Confessions of a SAHM Chic on a Shoestring DecoratingThe Shabby Nestmonogram

Monday, March 7, 2011

Weekend Creations

 So after making a few different "glimmer" sprays, this is what I did with the test tags.

I love how the glimmer plays with the pearl and it works so well with the inked edges.


 There is no right or wrong way of making these tags. I used the lightest chipboard available, my Tim Holtz Tattered Flowers Die, My Tim Holtz Tag Die, a Spellbinders labels die, pearls and hat pins, Tim Holtz masking tape, various stamps and inks and my homemade "shimmer" mists. You can chose to use whatever adhesives you like, I tend to stick with (punny!) using glue dots and foam squares for immediate gratification! The best things about these is that you do what you want and no matter what, it still looks great!


The DIY Show Off
A Marvelous Mess


Enjoy and have a happy Monday,
Viviana

LinkWithin

Related Posts with Thumbnails