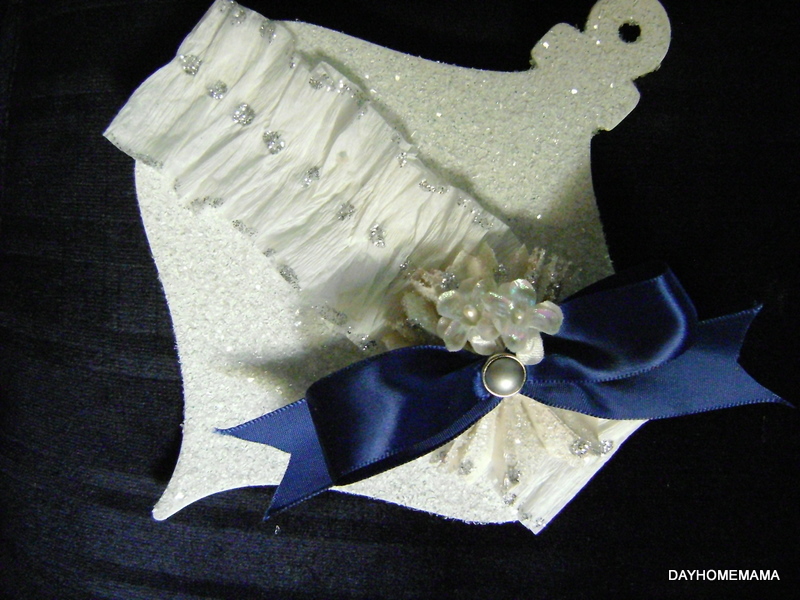
I bought some tiny Dollar Store birdhouses, but before I could take pictures of all of them, I sold some. The two that were left were are the only ones I could share with you. You'll notice one has a large paper rose on the back, that's one of my hand made paper roses, you'll find the tutorial here. Now you can imagine the other birdhouses were just as pretty, sparkly and sweet. Thanks for looking.
The birdies were also sold long before I managed to take a picture of them, this is the only one left. I will make a few more because I love them. Notice the rosette? Tim Holtz is a genius, and I hear he is coming up with a mini one, how lovely! So this is it for my Shabby Sunday Share, enjoy!
Cheers and happy Sunday,
Viviana
Showing posts with label cottage style. Show all posts
Sunday, January 16, 2011
Friday, October 29, 2010
Paper Roses with an old and still useful punch! -With Awesome Tutorial!
I was looking on you tube at a few tutorials for making paper roses, and almost all require you to cut your paper with a Cricut/Expensive machine, or even a Big Shot/Die cutter (I have one and the dies I could use), however I wanted to do a tutorial to show that even if all you have a is a punch, you can still make them and they turn out just as beautiful!
I Started with an EK success paper shaper I've had for years! The blossoms it punches out are about 2.5 inches in width, perfect for my projects. I don't want my roses too big, but any smaller might be harder to work with.
I then cut out 4, where most tutorials did three, I like my roses a little fuller and 4 gives me the right amount of layers for these roses.
The next step is to cut each one up, as you can see you get the layers that go from one to 5 petals. Each one fits right onto the next when we get to the gluing process.
I then use a skewer (you can also use a little paint brush end or a pencil, to curl my pieces, you can see some are curled lengthwise, the other just curled under, the paper pattern gives them dimension (I used some old K and Co paper I had on hand) and I love the vintage look too.
Once this was done, I went and used the hot glue gun because it's fast and super easy, just don't burn yourself.
I did one layer at a time carefully adding just a tiny dab of glue, since it's easier to add more where needed rather than try to remove a big glob of it.
I don't worry too much about the threads of glue just yet, I generally clean up my stuff with tweezers after. Once you have layers all glued and folded and curl how you want them, you can trim the back end, and use a glue dot to adhere to your project.
I used stickles on mine, since they will go one some of my Christmas and Victorian looking ornaments.
You can see in the picture that a rose made with 3 punches doesn't look as pretty as the next one (darker one) made with 4 punches. I am gonna go punch out a few more and cut and get them ready, great to do while watching TV!
Cheers, have fun crafting!
Viviana
I Started with an EK success paper shaper I've had for years! The blossoms it punches out are about 2.5 inches in width, perfect for my projects. I don't want my roses too big, but any smaller might be harder to work with.
I then cut out 4, where most tutorials did three, I like my roses a little fuller and 4 gives me the right amount of layers for these roses.
The next step is to cut each one up, as you can see you get the layers that go from one to 5 petals. Each one fits right onto the next when we get to the gluing process.
I then use a skewer (you can also use a little paint brush end or a pencil, to curl my pieces, you can see some are curled lengthwise, the other just curled under, the paper pattern gives them dimension (I used some old K and Co paper I had on hand) and I love the vintage look too.
Once this was done, I went and used the hot glue gun because it's fast and super easy, just don't burn yourself.
I did one layer at a time carefully adding just a tiny dab of glue, since it's easier to add more where needed rather than try to remove a big glob of it.
I don't worry too much about the threads of glue just yet, I generally clean up my stuff with tweezers after. Once you have layers all glued and folded and curl how you want them, you can trim the back end, and use a glue dot to adhere to your project.
I used stickles on mine, since they will go one some of my Christmas and Victorian looking ornaments.
You can see in the picture that a rose made with 3 punches doesn't look as pretty as the next one (darker one) made with 4 punches. I am gonna go punch out a few more and cut and get them ready, great to do while watching TV!
Cheers, have fun crafting!
Viviana
Thursday, September 30, 2010
Working on Ornaments for the Craft Sales!!
Michael's had these chipboard albums last year, so I turned them into ornaments (I got the idea from Sugar Sugar), she sold them on her website. Mine may not be as knockout pretty, but I think they come close!
What do you think?
Cheers,
Viviana
What do you think?
Cheers,
Viviana
Saturday, September 25, 2010
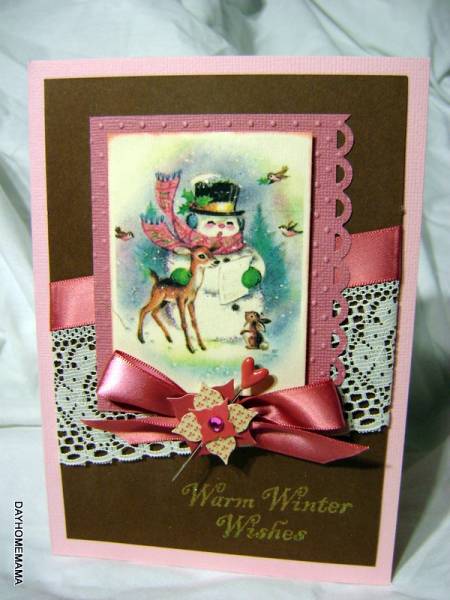
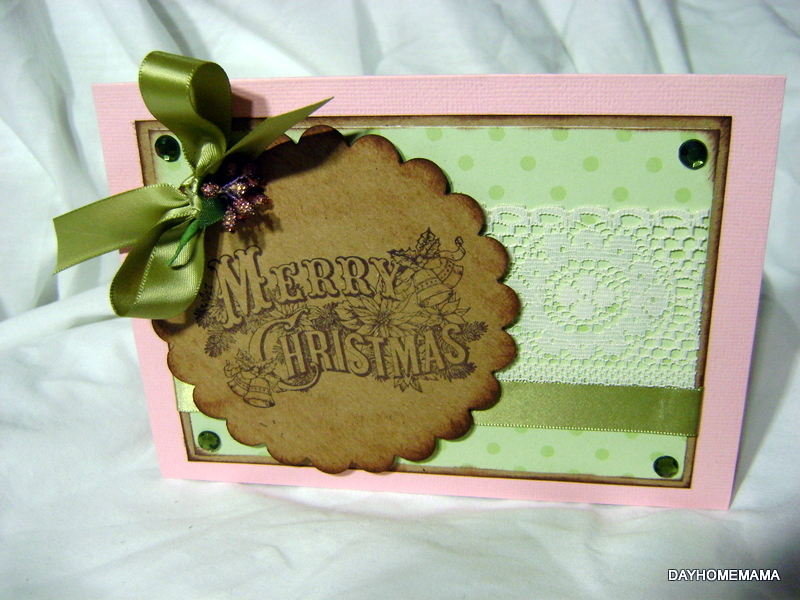
Got Some Cards Done, Finally!
The fact that I have been busy making cards can only mean one thing, winter is coming....oh and having a cold means I'm housebound only motivated to create, not clean or do housework....yeah!
It feels good, it makes me happy!
Cheers,
Viviana
It feels good, it makes me happy!
Cheers,
Viviana
Wednesday, March 24, 2010
Happy Spring GIVEAWAY for the crafty types!
So, I told you all I was going to do a giveaway when I hit 100 followers...well I'm at 109 followers!! I was so busy with Birthday's and St. Patrick's and life, that I just only realized I have surpassed the 100 mark.
Time for a Giveaway, Yay!


So I'm giving away a wonderful kit I've just put together, full of yummy shabby chic/vintage style goodness for your crafting pleasures. It's made up of K and Co papers, a wine paper bag album, lots of trim consisting of 3 colours of seam binding, 3 kinds of lace, lots of die cuts, photo corners, buttons, tags, 2 sheets of ephemera, a dozen mini paper roses in pink and cream, and some other embellishments, as you can see in the pictures. You get everything in the picture anyhow, though I may have missed mentioning a few items, it is a kit full of delicious crafty goodness! I also forgot and so it's not pictured, there are also some paper borders and a tea dyed hand crocheted doily in the mix!

All you have to do is leave me a comment and be a follower and I will enter you. If you mention my giveaway on your blog, leave me another comment for another entry...and if you follow me on twitter (http://twitter.com/dayhomemama), comment again for a third entry!!

I hope you all enter this giveaway, it would also make a great gift for Mother's day...hint hint! I giveaway will close on April 3rd and a winner will be randomly picked on the 4th of April. Good luck, Bon Chance, Buena Suerte!
Cheers,
Viviana
Time for a Giveaway, Yay!
So I'm giving away a wonderful kit I've just put together, full of yummy shabby chic/vintage style goodness for your crafting pleasures. It's made up of K and Co papers, a wine paper bag album, lots of trim consisting of 3 colours of seam binding, 3 kinds of lace, lots of die cuts, photo corners, buttons, tags, 2 sheets of ephemera, a dozen mini paper roses in pink and cream, and some other embellishments, as you can see in the pictures. You get everything in the picture anyhow, though I may have missed mentioning a few items, it is a kit full of delicious crafty goodness! I also forgot and so it's not pictured, there are also some paper borders and a tea dyed hand crocheted doily in the mix!
All you have to do is leave me a comment and be a follower and I will enter you. If you mention my giveaway on your blog, leave me another comment for another entry...and if you follow me on twitter (http://twitter.com/dayhomemama), comment again for a third entry!!
I hope you all enter this giveaway, it would also make a great gift for Mother's day...hint hint! I giveaway will close on April 3rd and a winner will be randomly picked on the 4th of April. Good luck, Bon Chance, Buena Suerte!
Cheers,
Viviana
Labels:
album kit,
altered art,
atc,
buttons,
cards,
collage,
cottage style,
ephemera,
freebie,
giveaway,
paperbag album,
pink,
scrapbooking,
shabby chic,
share,
tags,
victorian,
vintage
Saturday, March 13, 2010
Thrifty Finds and Other Adventures
Sneak a peek.....but first:
A couple weeks ago, I went to the thrift store just down the road from my house, and for $1.00, I came home with this (add the frame and mirror for another 3.75). I got started on the first little project and as you will see, it will be quite perfect for Brag Monday, since I used one of Graphic Fairy's little gems! I know it's Saturday night, but since I have a busy week ahead, I want to be ready, or I'll miss the boat for another week.
I'm thinking I have to now find some flowers, maybe some real tulips to put it the can, it will look perfect for spring.

But first, I think the mustard paint job has to go, ewwww, I like mustard, just not on my milk cans!
Used the trusty Tremclad again, I love that glossy pink way too much...one has to try to make good use of every bit of paint, so as you can see, I was killing two birds (so to speak, I am an animal lover!!) with one stone.
This is it, dry and ready for it's close up.
What do you think? Is it worthy of Brag Monday?? I hope my own tulips eventually come up so I can brag about those too.....
Remember I was telling you about my friend Barb taking me on a little expedition last week? This gorgeous wall hook/hanger thingy for $4. I am going to use it for the keys because my old one just fell of the wall (actually I think I ripped it off the wall because I pulled on the keys to hard and then it hung by one nail, sideways, for a week before I gave up trying to hang anything from it) and honestly the little hooks are just not big enough for more than one set of keys. This one is far prettier and imagine, I did not have to alter it in a way, shape or form! I do have to make sure I use heavy duty drywall anchors this time though, the thing weighs a ton (made out of cement or what??), and my key pulling strength does not need to be tested on this one.
Anyhow, happy Saturday and remember to spring forward your clocks tonight!!
Cheers,
Viviana
Monday, January 18, 2010
Due to Lack of Interest....

I am cancelling this giveaway and donating the handmade Heart wall decoration to Hearts For Haiti, which will sell it with 100% of proceeds going to Helping the Victims of the Haiti Earthquake.
I think this is better and it goes to a great cause, so if you are interested , it will be available for sale on ETSY.
Cheers,
Viviana
Tuesday, January 12, 2010
Listing Valentine's Finally!!


Without a fast computer, it all takes me forever to do, but slowly I am getting some cards and valentines listed in my Etsy store, Yay! What do you think?
Labels:
art,
birds,
blue,
cards,
cottage style,
cupid,
ephemera,
glitter,
handmade,
love,
pink,
roses,
shabby chic,
valentines blog,
victorian
Subscribe to:
Posts (Atom)