Showing posts with label tutorial. Show all posts

Monday, February 7, 2011

Mini Tutorial for DIY gals, on a Snowy Day

 This is a great way to make the sanitizer and lotion dispensers match, we have ours in the hallway where everyone can use them when they need to, I thought it would be a clever way to add a little colour and make them look more classy.
Some 12x12 scrapbook paper, ribbon double sided sticky tape and some ugly bottles of hand sanitizer and hand lotion.

Cut the paper to height needed and adhere using sticky tape, use left over strip to fit over the bottles.

Once you adhere the strips, tie the ribbon around each bottle and TADA! You've got some pretty in your life.

I think they look quite lovely right there.... gotta get better at tying ribbon though!

It's yet another snowy day, but before I take off to go shovel our walkway... here is my contribution for the week (I may have more if I get the chance), but I thought this would be great for Blue Monday.

Smiling SallyPhotobucketSurvey JunkieAnything Related

Thanks for looking,
Viviana

Sunday, January 30, 2011

Large Paper Rose Tutorial

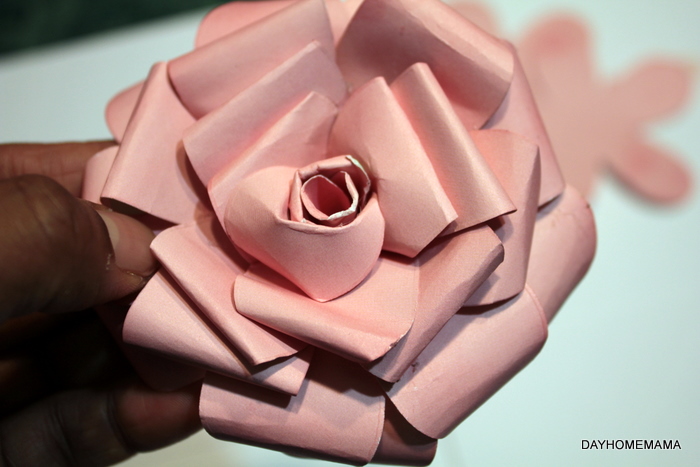
This is the finished flower before the chalk and the sparkles.
Super Sunday, it's early in the am and I'm not moving very fast....maybe it's the snow, slowing me down a bit! I am once again sharing my version of Tim Holtz's paper rose, but this time I am using my Big Flower die from Stampin' Up.


I cut out as many flowers out of a 12x12 sheet of paper, I used some old stuff I already had.

There's my pile, I wasn't sure yet how many layers I needed. I bought that paper for 10c a 12x12 sheet at Scrapbookers Paradise, It's good to have on hand for projects like this, so if you mess up, it's not $1.50 paper!

I then used my chalks (I'm all for using what you have on hand) or you can use distress inks, I just haven't bought any because I already have so many other media I can use to tint and colour with.

So this is where the tutorials meet, I cut out the pieces the same as I did for the smaller roses, so that I had 1, 2, 3, 4 and three with 5 petals. Those ended up being all the layers I needed for a full rose

I used a pencil to curl my petals, since this flower is much bigger a skewer was too small. The 1 and 2 petals I curled in wards, the rest out.

I used hot glue to add each layer, I am not patient enough for liquid glues and I like the instant bond too!

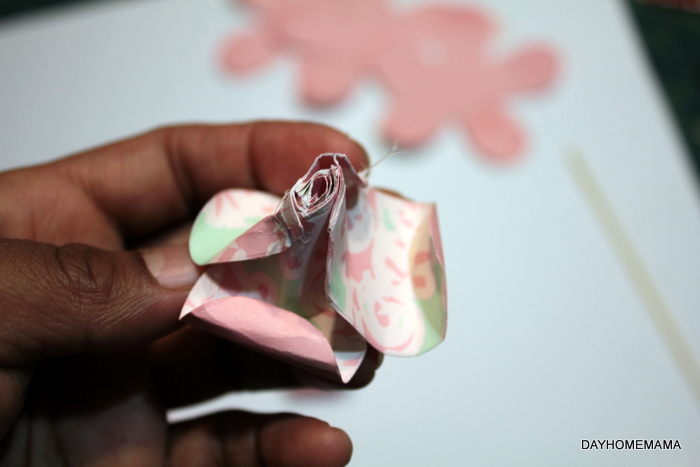
This is the back so far, I snip off bit so the rose will be slightly flatter.

I then chalked some more, you can also ink if you like. It gives it more depth and definition and adds dimension.

Then instead of Stickles, I use spray adhesive (instant bond again!!) and some sparkles to give it a beautiful glow.
I love these chunky iridescent sparkles.
So that's it, pretty straight forward. You can always use the other Rose Tutorial for a step by step guide, it's pretty much the same but as you can see this is the size of my hand. I am using it for a "welcome to out home" sign and I will post the finished project when I get it done....

Have a happy sunday,
Viviana


Thursday, January 20, 2011

Pretty Paper Slippers

You know when you're dying to try something, but really have no reason to? Yeah, well that's where these came from. I loved them when I saw them Artful Affirmation, where she has a template you can use and a video tutorial too, which is awesome for you visual types. I hear a  lot of people do exchanges of these pretty shoe slippers, and giving them in gifts would be absolutely fabulous....so I had give them a try. I love how they turned out.

Cheers,
Viviana

I trimmed mine with feathers and velvet ribbons.

I used a handmade paper rose, and the accordion folded paper is from the rosette die.


This one has a rosette with a button middle.

I put a back on both of them, it definitely makes them look more elegant.  

Friday, October 29, 2010

Paper Roses with an old and still useful punch! -With Awesome Tutorial!

I was looking on you tube at a few tutorials for making paper roses, and almost all require you to cut your paper with a Cricut/Expensive machine, or even a Big Shot/Die cutter (I have one and the dies I could use), however I wanted to do a tutorial to show that even if all you have a is a punch, you can still make them and they turn out just as beautiful!

I Started with an EK success paper shaper I've had for years! The blossoms it punches out are about 2.5 inches in width, perfect for my projects. I don't want my roses too big, but any smaller might be harder to work with.

I then cut out 4, where most tutorials did three, I like my roses a little fuller and 4 gives me the right amount of layers for these roses.

The next step is to cut each one up, as you can see you get the layers that go from one to 5 petals.  Each one fits right onto the next when we get to the gluing process.

I then use a skewer (you can also use a little paint brush end or a pencil, to curl my pieces, you can see some are curled lengthwise, the other just curled under, the paper pattern gives them dimension (I used some old K and Co paper I had on hand) and I love the vintage look too.

Once this was done, I went and used the hot glue gun because it's fast and super easy, just don't burn yourself.


I did one layer at a time carefully adding just a tiny dab of glue, since it's easier to add more where needed rather than try to remove a big glob of it.

I don't worry too much about the threads of glue just yet, I generally clean up my stuff with tweezers after. Once you have layers all glued and folded and curl how you want them, you can trim the back end, and use a glue dot to adhere to your project.


I used stickles on mine, since they will go one some of my Christmas and Victorian looking ornaments.

You can see in the picture that a rose made with 3 punches doesn't look as pretty as the next one (darker one) made with 4 punches. I am gonna go punch out a few more and cut and get them ready, great to do while watching TV!


Cheers, have fun crafting!
Viviana

Friday, September 24, 2010

The perfect Cinnamon Scone, right in my own kitchen!

The hunt for the perfect recipe was brought on because of a bakery called COBS, which makes the ridiculously delicious cinnamon scones. Of course, in my weakest moments I have had to run over there and buy 4 (you get a deal for bulk purchases), and since I am of the thrifty nature, I thought what better tan to figure them out to make for myself.
Now the key ingredient is cinnamon, which to me is one if not THE most amazing of all spices!

So I decided to use a basic recipe for scones, I found one on the Taste web site, which looked easy enough, though instead if greasing the cookie sheet I would have used parchment paper. Then I came across this web site, Scones.Org.uk, which made me jump for joy!

  • 2 cups self-rising flour
  • 30g butter at room temperature
  • ½ cup milk
  • ⅓ cup water
Simple ingredients, simple instructions, minor alterations. 

I wanted the little burst of cinnamon the Cobs scones had, but I didn't want to mail order the cinnamon flv-r-bites, I wanted them now. So I created my own by blending 3 tablespoons of cinnamon with 2/3 cup sugar and some water. I used the same technique used to make sugar roses (or sugar shapes for tea parties), except I didn't mold them, I just spread the sugar out on a plate to dry over night.

The result was perfect, except for the middle bit which I had to scrape off with a spatula because it sort of adhered to the plate quite nicely.

  • Preheat your oven to 210 degrees Celsius and prepare a baking sheet by greasing with butter or oil.
  • Sift flour into a mixing bowl.(At this point add sugar/cinn mixture and stir well)
  • Chop butter into small pieces and add to flour.
  • Make a small depression in the middle of the flour and butter mixture.
  • In a small bowl, combine milk and water.
  • Slowly pour liquid into the depression made in the flour.
  • Mix all ingredients with a flat knife until a soft dough forms.
  • Turn dough out onto a lightly floured surface and knead briefly until smooth.
  • Roll out the dough to form a 2cm thick round.
  • Cut the dough into individual scones approximately 5cm in diameter.
  • Place scones on baking sheet and glaze with milk.
  • Bake 10-12 minutes or until scones are golden brown.

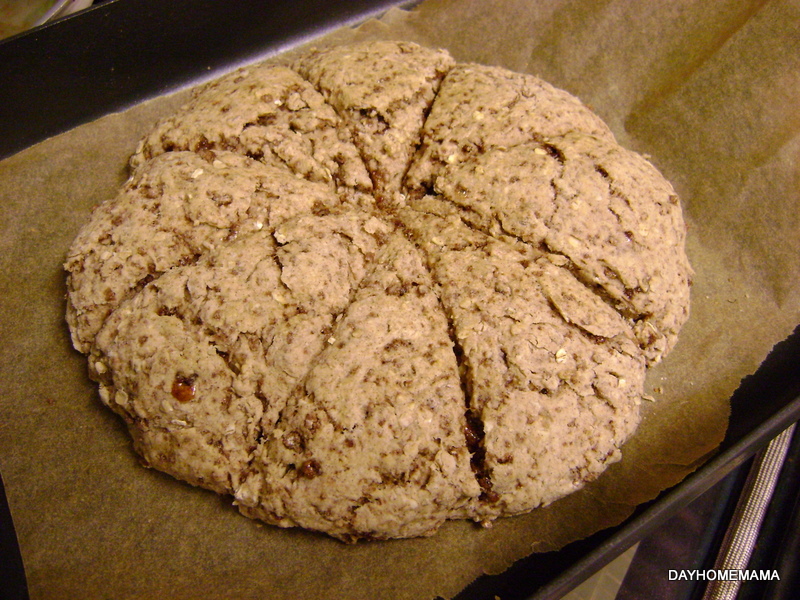
I added the sugar crumbles to the flour and mixed it well before adding the wet ingredients.
It looked wonderful, and baked perfectly !

I didn't separate the individual scones though, I didn't want them to dry out at all.


I also decided to add a little glaze made of icing sugar, cinnamon and milk  and I drizzled it over the still warm scones.

They were the perfect accompaniment to my coffee, and my son thought they were awesome with soy milk.
So now, although I can always run out to the store to get my cinnamon scone fix, I don't have to...specially if the craving strikes at 9 pm!

If you try, let me know how they turn out.
Cheers,
Viviana


Saturday, January 23, 2010

Now This BLOG is FABULOUS!


I have been lifting ideas, images and inspiration from this blog for a few months now, so I suppose it's time I gave her props and shared with all of you how fabulous Cathe Holden and her blog Just Something I Made really is.
I have used no less than 6 of her tutorials and ideas in my own household, and that is really amazing since I always thought I has some great things going.
One of my favourites and latest finds deep in her archives is this, which I will share with you because I'm sure she won't mind, and I am using today. I have tons of fabric and leather renmants lying around in piles and in drawers, last night I gathered them up and I am in the process of printing the pdf file for Organizing Fabric Renmants as we speak (I'm multi-tasking!!). It is time to get them rolled up and sorted in my newly acquired giant drawer filing cabinet.

You can get the PDF format labels to print yourself from her tutorial.


Another one of my favourite tutorials was this one,

called Leather Mounting Plaques, using the free pdf file (which you can get from Cathe's blog)
I made a few brooches and it gave me the idea for using some die cuts for a similar look.

I have too many charms and just wasn't sure what to do with some, so this was a perfect way to make unique gifts and items for my Etsy Shop.


For my next project (as soon as I get my sewing machine back) I will be making this!

I happen to have a few placemats in a blue flower print, which I picked up more than 5 years ago for 10cents each at liquidation world. I'm tired of squashed tissue boxes in my mini-van, and using this idea will save me from the frustration of muddy/slushy boot prints on my kleenx next time I go use one. I will eventually post a picture for you all to see the finished product.

Anyhow, if one day you find yourself bored and looking for some wonderful inspiration from a great designer, go visit Cathe at Just Something I Made, you'll find yourself lost in her blog for hours!

LinkWithin

Related Posts with Thumbnails