Showing posts with label homemade. Show all posts

Sunday, December 11, 2011

Never Fail RED VELVET fudge

In recent years, red velvet has become one of the most popular cakes, cupcake and flavours to serve for parties and events. I searched for the perfect red velvet fudge recipe, one that did not require me to be an expert or have special tools in my cupboard to get it done right. Luck for me, I am quite adventurous and decided to adapt a popular marshmallow recipe to re-create the cake into a special gifting Christmas treat.
You can find the recipe with the link or by clicking on the image. I have added it to the new friendscookbook, where you too can add recipes and share them with you FB friends.

Cheers and enjoy the sweets!
Viviana
I'll be joining in these linky parties:


Sumo's Sweet Stuff
Mandy‘s Recipe Box
Nap-Time Creations

Monday, March 7, 2011

Weekend Creations

 So after making a few different "glimmer" sprays, this is what I did with the test tags.

I love how the glimmer plays with the pearl and it works so well with the inked edges.


 There is no right or wrong way of making these tags. I used the lightest chipboard available, my Tim Holtz Tattered Flowers Die, My Tim Holtz Tag Die, a Spellbinders labels die, pearls and hat pins, Tim Holtz masking tape, various stamps and inks and my homemade "shimmer" mists. You can chose to use whatever adhesives you like, I tend to stick with (punny!) using glue dots and foam squares for immediate gratification! The best things about these is that you do what you want and no matter what, it still looks great!


The DIY Show Off
A Marvelous Mess


Enjoy and have a happy Monday,
Viviana

Wednesday, January 26, 2011

Working on being more domestic....ahahah!

A little slow in uploading the picture, but these are our waffles just before the freezer, I use just a little double waffle maker, perfect!
My son asked me why he's had to eat cereal for weeks (it's been a month and  it's healthy stuff with fruit and omega3-6 soy milk!) and no waffles or pancakes, or eggs and sausages.
I guess in my plight to eat healthy I stopped using any mixes that weren't homemade, and cutting back on the amount of meats we eat, I forgot that not everyone wants to eat muesli with ground flax everyday!
So I searched the web for a great recipe for waffles, overnight waffles to be exact...the yeasty kind, the kind that makes my mouth water when I think of how yummy they are topped with fruit and whipped cream.
I settled on The Pioneer Woman's Overnight Waffle Recipe, which looked easy and tasty too.
I didn't change much on it, except that I used half almond half soy milk at 1 cup of each (my son can't handle milk, but butter is ok) rather than regular cow's milk.
Here is the ingredients,
  • 2 cups All-purpose Flour
  • 1 teaspoon Yeast
  • 1 Tablespoon Sugar
  • 1 teaspoon Cinnamon
  • ½ teaspoons Salt
  • 2 cups Milk
  • ½ teaspoons Vanilla Extract
  • 1 whole Large Egg
  • 6 Tablespoons Unsalted Melted Butter
  • Nonstick Spray For Waffle Iron
I loved that you can mix and go to bed, and I got up at 6:30 rather than 6 to make them!

These are their instructions, super easy!
1. In a large bowl, combine flour, yeast, sugar, cinnamon and salt. Whisk in milk and vanilla until blended. Cover the bowl tightly with plastic wrap and let stand overnight at room temperature.
2. In the morning, heat the waffle iron. Beat the egg and melted butter into the batter, which will be quite thin. Spray hot waffle iron with nonstick spray. Add just enough batter to cover the cooking surface.
3. Cook waffles until crisp and brown, but not too dark, about 2-3 minutes each.
Makes 6-8 standard waffles, or 3-4 Belgian waffles.

Since there is only two of us (and he is 6) we only ate 3 waffles and froze the rest so we can pop them into the toaster later on in the week. Today I served them with banana slices and breakfast sausages, next time maybe we'll do a poached egg and berries. The texture is crispy on the outside and fluffy in the middle, my son loved the cinnamon and asked if they were chocolate ; a true complement on the taste!

This is what we ate at Grandmas every morning, she has a huge raspberry patch!!

Photobucket

Tomorrow I shall make eggs, with tortillas (the homemade corn ones)...egg tacos perhaps, yum!
Onwards and forward with my domestic endeavours!

Cheers,
Viviana

Friday, September 24, 2010

The perfect Cinnamon Scone, right in my own kitchen!

The hunt for the perfect recipe was brought on because of a bakery called COBS, which makes the ridiculously delicious cinnamon scones. Of course, in my weakest moments I have had to run over there and buy 4 (you get a deal for bulk purchases), and since I am of the thrifty nature, I thought what better tan to figure them out to make for myself.
Now the key ingredient is cinnamon, which to me is one if not THE most amazing of all spices!

So I decided to use a basic recipe for scones, I found one on the Taste web site, which looked easy enough, though instead if greasing the cookie sheet I would have used parchment paper. Then I came across this web site, Scones.Org.uk, which made me jump for joy!

  • 2 cups self-rising flour
  • 30g butter at room temperature
  • ½ cup milk
  • ⅓ cup water
Simple ingredients, simple instructions, minor alterations. 

I wanted the little burst of cinnamon the Cobs scones had, but I didn't want to mail order the cinnamon flv-r-bites, I wanted them now. So I created my own by blending 3 tablespoons of cinnamon with 2/3 cup sugar and some water. I used the same technique used to make sugar roses (or sugar shapes for tea parties), except I didn't mold them, I just spread the sugar out on a plate to dry over night.

The result was perfect, except for the middle bit which I had to scrape off with a spatula because it sort of adhered to the plate quite nicely.

  • Preheat your oven to 210 degrees Celsius and prepare a baking sheet by greasing with butter or oil.
  • Sift flour into a mixing bowl.(At this point add sugar/cinn mixture and stir well)
  • Chop butter into small pieces and add to flour.
  • Make a small depression in the middle of the flour and butter mixture.
  • In a small bowl, combine milk and water.
  • Slowly pour liquid into the depression made in the flour.
  • Mix all ingredients with a flat knife until a soft dough forms.
  • Turn dough out onto a lightly floured surface and knead briefly until smooth.
  • Roll out the dough to form a 2cm thick round.
  • Cut the dough into individual scones approximately 5cm in diameter.
  • Place scones on baking sheet and glaze with milk.
  • Bake 10-12 minutes or until scones are golden brown.

I added the sugar crumbles to the flour and mixed it well before adding the wet ingredients.
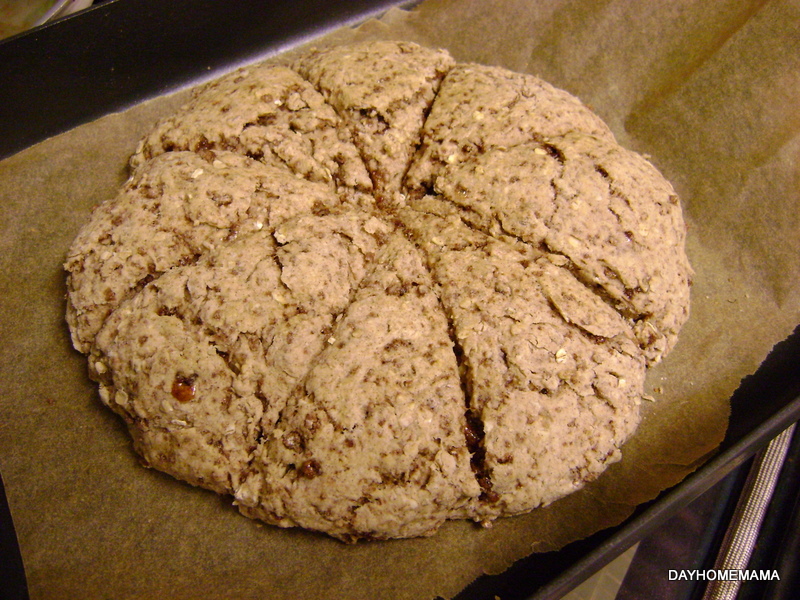
It looked wonderful, and baked perfectly !

I didn't separate the individual scones though, I didn't want them to dry out at all.


I also decided to add a little glaze made of icing sugar, cinnamon and milk  and I drizzled it over the still warm scones.

They were the perfect accompaniment to my coffee, and my son thought they were awesome with soy milk.
So now, although I can always run out to the store to get my cinnamon scone fix, I don't have to...specially if the craving strikes at 9 pm!

If you try, let me know how they turn out.
Cheers,
Viviana


LinkWithin

Related Posts with Thumbnails