This one is a little pinch box, great for goodies and other bits and bobs. I used mine for Caramel corn, it hold the perfect serving. Hopefully you'll find it useful.
Cheers,
Viviana
Friday, December 17, 2010
Wednesday, December 15, 2010
Freebies- Popcorn wrapper and Cocoa Envelope.
I had fun making these, and thought I'd like to share with you all, they look so cute all finished up. I will post another picture later of them with the sparkles and all!
Let me know if they are working out, and if you want, I have the PDF files for them, I can email any requests. Check out Graphics Fairy, for lots of wonderful vintage images, it's where I got the second, third and fourth image...can't remember where the first one came from, but it's very cute too!
Cheers!
Viviana
Friday, December 3, 2010
David also has an entrepreneurial spirit!
I'm very proud of this little man, my son David. He made it into an article for The Weekly Albertan, an online newspaper for the Southern Alberta Institute of Technology!
Also in other fun and exciting news, our Christmas tree is up!! A foot and half shorter than all the other years because somehow I managed to misplace part of it, so now I have a "few" extra branches....but we like our cute 5ft tree, it actually fits nicely in our small livingroom. I will have pictures soon as I find the camera!!!
Have a great weekend,
Viviana
Wednesday, November 10, 2010
Better Late than Never, Halloween Costume 2010
I just wanted to share this years costume, I'm a little late, but atleast it's still 2010.
Now, David watched a movie called TRON, some of you may remember from back in the 80's.... a new one is coming out in December. He was so into the 80's one, that he decided a few months back he wanted to be a TRON character for Halloween. I am the SuperMom of costumes, so this is what we came up with...hope you like.
Cheers,
Viviana
Friday, October 29, 2010
Paper Roses with an old and still useful punch! -With Awesome Tutorial!
I was looking on you tube at a few tutorials for making paper roses, and almost all require you to cut your paper with a Cricut/Expensive machine, or even a Big Shot/Die cutter (I have one and the dies I could use), however I wanted to do a tutorial to show that even if all you have a is a punch, you can still make them and they turn out just as beautiful!
I Started with an EK success paper shaper I've had for years! The blossoms it punches out are about 2.5 inches in width, perfect for my projects. I don't want my roses too big, but any smaller might be harder to work with.
I then cut out 4, where most tutorials did three, I like my roses a little fuller and 4 gives me the right amount of layers for these roses.
The next step is to cut each one up, as you can see you get the layers that go from one to 5 petals. Each one fits right onto the next when we get to the gluing process.
I then use a skewer (you can also use a little paint brush end or a pencil, to curl my pieces, you can see some are curled lengthwise, the other just curled under, the paper pattern gives them dimension (I used some old K and Co paper I had on hand) and I love the vintage look too.
Once this was done, I went and used the hot glue gun because it's fast and super easy, just don't burn yourself.
I did one layer at a time carefully adding just a tiny dab of glue, since it's easier to add more where needed rather than try to remove a big glob of it.
I don't worry too much about the threads of glue just yet, I generally clean up my stuff with tweezers after. Once you have layers all glued and folded and curl how you want them, you can trim the back end, and use a glue dot to adhere to your project.
I used stickles on mine, since they will go one some of my Christmas and Victorian looking ornaments.
You can see in the picture that a rose made with 3 punches doesn't look as pretty as the next one (darker one) made with 4 punches. I am gonna go punch out a few more and cut and get them ready, great to do while watching TV!
Cheers, have fun crafting!
Viviana
Tuesday, October 12, 2010
14 years later, and I think I still got it!
I have always loved drawing. Since I was very young, I remember sitting beside my Dad's drafting table, or at the coffee table and sketching all kinds of stuff...my mom, my feet, horses, models from magazines you name it, I drew it. But I slowly stopped, less time, more responsibilities, and just plain laziness....after a while, I guess after college, I just hardly picked up a pencil. The last portrait I ever did was of a friends Daughter, she is now 18 and graduated highschool!
So I dove head first into this one, I took a picture of my son with my little cheap point and shoot camera and voila, I drew again.
One night, a single HB graphite pencil and a blank canvas and, I think I still have it (98% maybe)...the touch. I guess the eye and the fingers for drawing just don't leave you. It's like riding a bicycle.....Love it!
Anyhow, Cheers all, I hope you enjoyed Thanksgiving here in Canada and Columbus Day in the U.S.
hugs,
Viviana
Thursday, September 30, 2010
Working on Ornaments for the Craft Sales!!
Michael's had these chipboard albums last year, so I turned them into ornaments (I got the idea from Sugar Sugar), she sold them on her website. Mine may not be as knockout pretty, but I think they come close!
What do you think?
Cheers,
Viviana
What do you think?
Cheers,
Viviana
Saturday, September 25, 2010
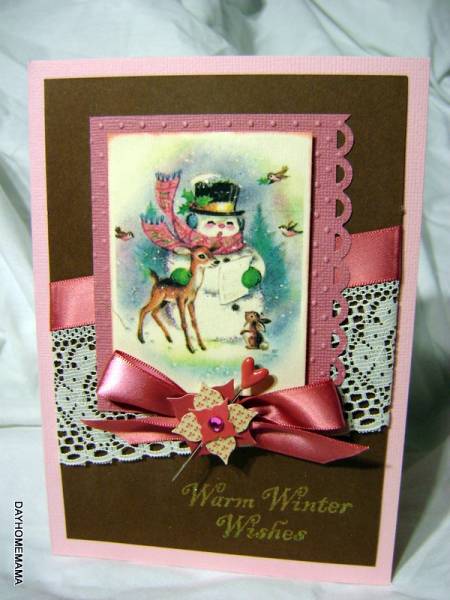
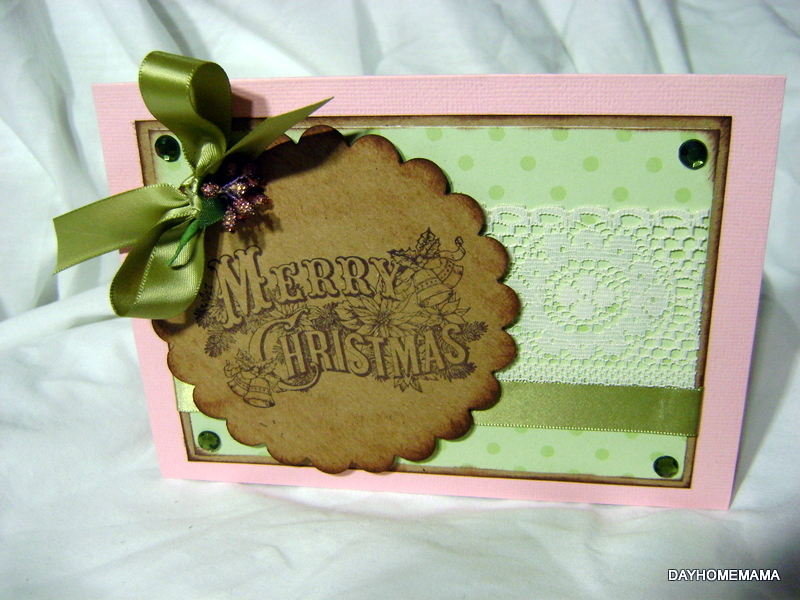
Got Some Cards Done, Finally!
The fact that I have been busy making cards can only mean one thing, winter is coming....oh and having a cold means I'm housebound only motivated to create, not clean or do housework....yeah!
It feels good, it makes me happy!
Cheers,
Viviana
It feels good, it makes me happy!
Cheers,
Viviana
Friday, September 24, 2010
The perfect Cinnamon Scone, right in my own kitchen!
The hunt for the perfect recipe was brought on because of a bakery called COBS, which makes the ridiculously delicious cinnamon scones. Of course, in my weakest moments I have had to run over there and buy 4 (you get a deal for bulk purchases), and since I am of the thrifty nature, I thought what better tan to figure them out to make for myself.
Now the key ingredient is cinnamon, which to me is one if not THE most amazing of all spices!
So I decided to use a basic recipe for scones, I found one on the Taste web site, which looked easy enough, though instead if greasing the cookie sheet I would have used parchment paper. Then I came across this web site, Scones.Org.uk, which made me jump for joy!
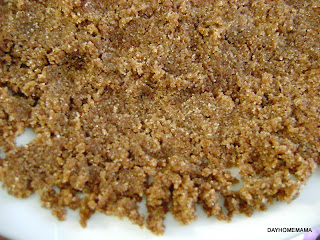
I wanted the little burst of cinnamon the Cobs scones had, but I didn't want to mail order the cinnamon flv-r-bites, I wanted them now. So I created my own by blending 3 tablespoons of cinnamon with 2/3 cup sugar and some water. I used the same technique used to make sugar roses (or sugar shapes for tea parties), except I didn't mold them, I just spread the sugar out on a plate to dry over night.
The result was perfect, except for the middle bit which I had to scrape off with a spatula because it sort of adhered to the plate quite nicely.
I added the sugar crumbles to the flour and mixed it well before adding the wet ingredients.
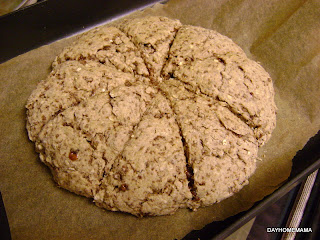
It looked wonderful, and baked perfectly !
I didn't separate the individual scones though, I didn't want them to dry out at all.
I also decided to add a little glaze made of icing sugar, cinnamon and milk and I drizzled it over the still warm scones.
They were the perfect accompaniment to my coffee, and my son thought they were awesome with soy milk.
So now, although I can always run out to the store to get my cinnamon scone fix, I don't have to...specially if the craving strikes at 9 pm!
If you try, let me know how they turn out.
Cheers,
Viviana
Now the key ingredient is cinnamon, which to me is one if not THE most amazing of all spices!
So I decided to use a basic recipe for scones, I found one on the Taste web site, which looked easy enough, though instead if greasing the cookie sheet I would have used parchment paper. Then I came across this web site, Scones.Org.uk, which made me jump for joy!
- 2 cups self-rising flour
- 30g butter at room temperature
- ½ cup milk
- ⅓ cup water
I wanted the little burst of cinnamon the Cobs scones had, but I didn't want to mail order the cinnamon flv-r-bites, I wanted them now. So I created my own by blending 3 tablespoons of cinnamon with 2/3 cup sugar and some water. I used the same technique used to make sugar roses (or sugar shapes for tea parties), except I didn't mold them, I just spread the sugar out on a plate to dry over night.
The result was perfect, except for the middle bit which I had to scrape off with a spatula because it sort of adhered to the plate quite nicely.
- Preheat your oven to 210 degrees Celsius and prepare a baking sheet by greasing with butter or oil.
- Sift flour into a mixing bowl.(At this point add sugar/cinn mixture and stir well)
- Chop butter into small pieces and add to flour.
- Make a small depression in the middle of the flour and butter mixture.
- In a small bowl, combine milk and water.
- Slowly pour liquid into the depression made in the flour.
- Mix all ingredients with a flat knife until a soft dough forms.
- Turn dough out onto a lightly floured surface and knead briefly until smooth.
- Roll out the dough to form a 2cm thick round.
- Cut the dough into individual scones approximately 5cm in diameter.
- Place scones on baking sheet and glaze with milk.
- Bake 10-12 minutes or until scones are golden brown.
I added the sugar crumbles to the flour and mixed it well before adding the wet ingredients.
It looked wonderful, and baked perfectly !
I didn't separate the individual scones though, I didn't want them to dry out at all.
I also decided to add a little glaze made of icing sugar, cinnamon and milk and I drizzled it over the still warm scones.
They were the perfect accompaniment to my coffee, and my son thought they were awesome with soy milk.
So now, although I can always run out to the store to get my cinnamon scone fix, I don't have to...specially if the craving strikes at 9 pm!
If you try, let me know how they turn out.
Cheers,
Viviana
Thursday, September 2, 2010
The First Day of Grade 1 has Arrived!!
So this was it, he picked his own outfit (black jeans, a white t-shirt and vest, and a hoodie with a skull and wings on it), he's perfecting his rock and roll style, and was ready and willing for his first day of Grade 1. What a trooper too, first day at a new school and on top of it all, his 2 friends Eric and Tara, who come to my dayhome, are not in his class!
I have to share these other pictures too, they were just too funny not to. He is such a clown!
If anyone has seen Diary of a Wimpy kid, you might recognize who he's being today!
Cheers and happy days,
Viviana
Saturday, August 7, 2010
Being on Vacation Means no Computer Time!!
I don't remember the last time I took the time to blog.... as a matter of fact, I haven't taken the time to craft or do much else indoors. It really was a long winter, and so we are making up for being cooped up inside by spending every breathing moment outside even if it's just laying on the lawn looking up at the blue skies! I figured I better let you all know I'm still alive and kicking though.
Hey, so I'm noticing a huge increase in Asian spam or I guess Asian replies on my posts, it doesn't matter what they are, the replies are always have links to Asian girls websites. It's kind of annoying, but now I moderate every post. Does anyone know how to keep them from posting all together?
On another much sweeter note, I got a beautiful little package in the mail a few days before I left on Vacation, so I'm only posting these now, but isn't it wonderful?? There are so many beauties in here. Tags, cards, wall hangings, scented car deos, soaps, linen spray, seashells!!, and lots and lots of roses!
This was for the exchange we did over at Esty Cottage Style. At least one item had to be roses, but I got lucky and almost everything was lovely roses, pink and in my range of favourite things, lucky girl I am!
So off I go, we want to go swimming, so I need to get off the computer. Hope everyone is having a great summer so far!
Cheers,
Viviana
Subscribe to:
Comments (Atom)


