 |
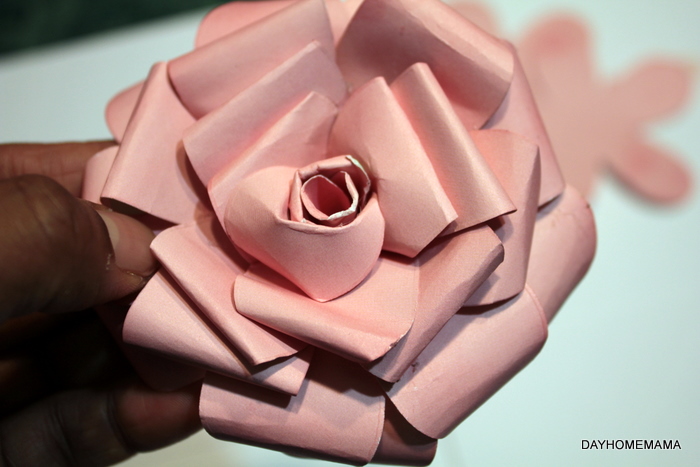
| This is the finished flower before the chalk and the sparkles. |
Super Sunday, it's early in the am and I'm not moving very fast....maybe it's the snow, slowing me down a bit! I am once again sharing my version of Tim Holtz's paper rose, but this time I am using my
Big Flower die from Stampin' Up.
 |
| I cut out as many flowers out of a 12x12 sheet of paper, I used some old stuff I already had. |
 |
| There's my pile, I wasn't sure yet how many layers I needed. I bought that paper for 10c a 12x12 sheet at Scrapbookers Paradise, It's good to have on hand for projects like this, so if you mess up, it's not $1.50 paper! |
 |
| I then used my chalks (I'm all for using what you have on hand) or you can use distress inks, I just haven't bought any because I already have so many other media I can use to tint and colour with. |
 |
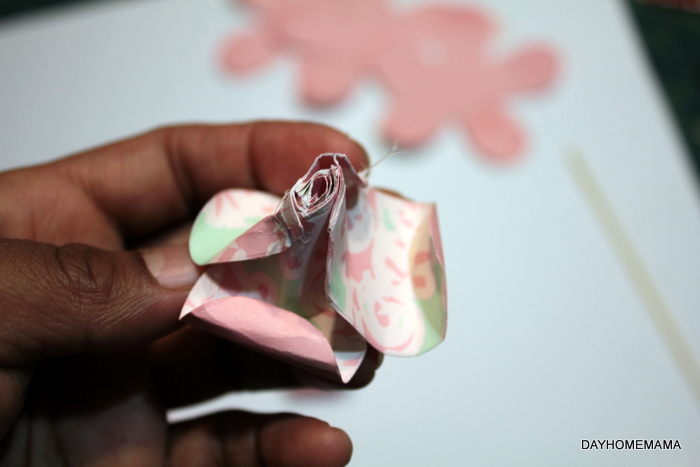
| So this is where the tutorials meet, I cut out the pieces the same as I did for the smaller roses, so that I had 1, 2, 3, 4 and three with 5 petals. Those ended up being all the layers I needed for a full rose |
 |
| I used a pencil to curl my petals, since this flower is much bigger a skewer was too small. The 1 and 2 petals I curled in wards, the rest out. |
 |
| I used hot glue to add each layer, I am not patient enough for liquid glues and I like the instant bond too! |
 |
| This is the back so far, I snip off bit so the rose will be slightly flatter. |
 |
| I then chalked some more, you can also ink if you like. It gives it more depth and definition and adds dimension. |
 |
| Then instead of Stickles, I use spray adhesive (instant bond again!!) and some sparkles to give it a beautiful glow. |
|
 |
| I love these chunky iridescent sparkles. |
So that's it, pretty straight forward. You can always use the other
Rose Tutorial for a step by step guide, it's pretty much the same but as you can see this is the size of my hand. I am using it for a "welcome to out home" sign and I will post the finished project when I get it done....
Have a happy sunday,
Viviana


5 comments:
love it! Thank You for Sharing!
Great tutorial Thanks for your time! I thought that we need to use a 6 petals flower but you demonstrate that we can do it with a 5 petal very well!... I will try that very soon!
What a great tutorial. Your rose turned out beautiful! I love the sparkles.
wow! i love these. great job :)
Beautiful! I'd love to see this a top a beautifully wrapped present!
Post a Comment